How to throw a baseball correctly
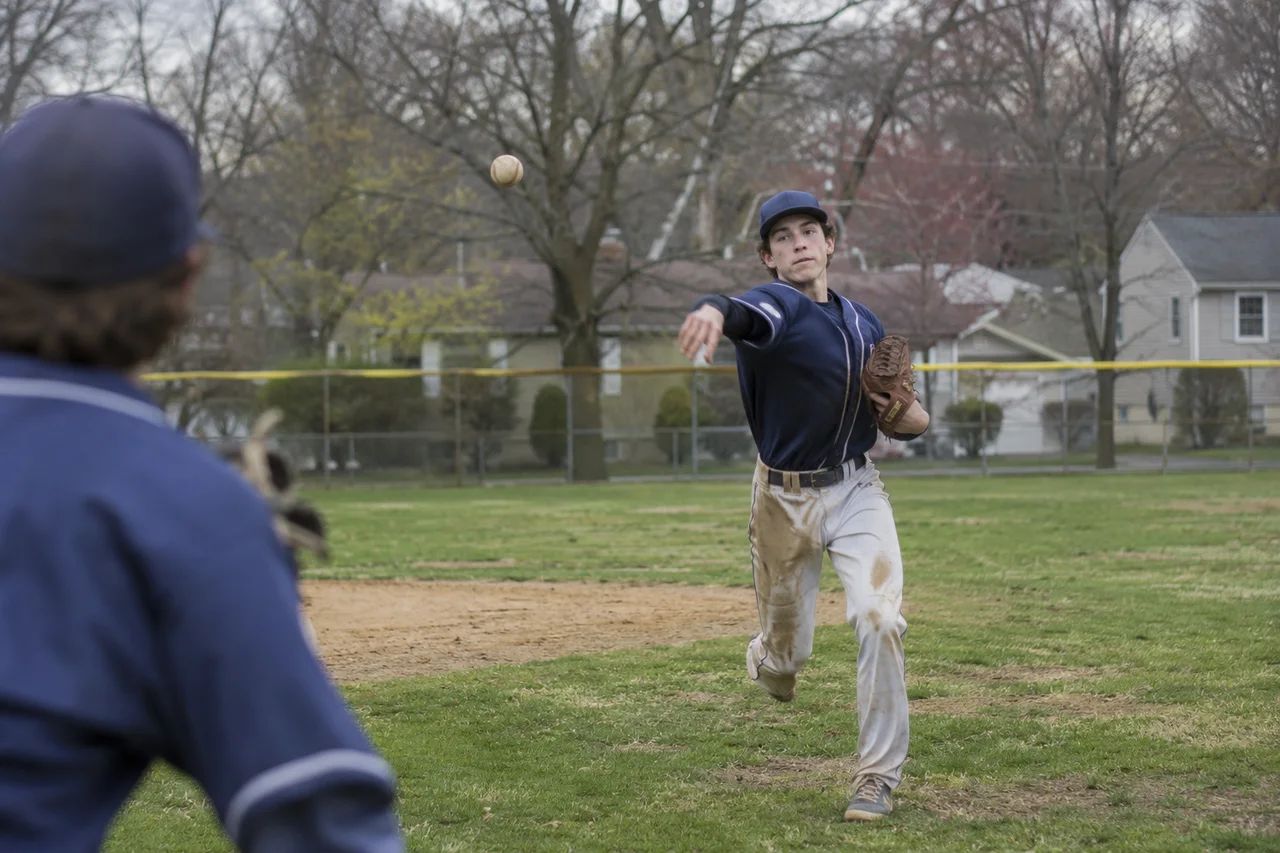
Every baseball play starts or ends with a throw. A shortstop who fields cleanly but throws wide still gives up the base. Learning how to throw a baseball correctly is the most useful skill a young player can build, for every position, not just pitchers.
This guide breaks the throw into four parts (grip, footwork, arm path, and follow-through), gives a drill progression to practice them, covers the mistakes coaches see most, and explains the arm care rules that keep young throwers healthy. For how scouts judge arm strength alongside the other skills, see our guide to the 5 tools of baseball.
How should you grip the ball?
Most throws use a four-seam grip. Turn the ball so the seams form a C shape, then lay the index and middle fingers across the seams, a little apart, with the thumb underneath. Across the seams, the ball spins straight backward, which helps it fly true and carry.
Fingertips, not the palm. Leave a small gap between the ball and the palm. A ball choked deep in the hand comes out slower and less accurate.
Small hands are fine. Young players can add the ring finger on top for a three-finger grip until their hand grows.
What should the feet do?
Good throws start from the ground. A player who throws flat-footed and facing the target has only their arm to work with, and the arm tires quickly.
Turn sideways. Before throwing, the glove-side shoulder points at the target, like an arrow.
Step at the target. The glove-side foot strides straight toward the target, landing with the toes pointing at it. Stepping off to the side pulls the throw off line.
Crow hop for distance. Outfielders and players making long throws add a crow hop: a short skip forward onto the throwing-side foot, which builds momentum before the stride.
Quick feet for infielders. On short throws, a quick shuffle to get sideways beats a big wind-up.
How does the arm move?
This is where most problems hide, so it helps to take it one piece at a time.
Break the hands. The ball comes out of the glove near the chest, and the throwing hand starts down and back.
Swing down, back, and up. The throwing arm makes a smooth, relaxed arc behind the body, with the ball facing away from the target at the top.
Get the elbow up. Coaches teach the elbow reaching about shoulder height before the arm comes forward, with the hand above the elbow. This position is often called the "power position."
Hips, then shoulders. As the front foot lands, the hips turn toward the target first, then the chest and shoulders follow. That order is where much of the speed comes from.
Tuck the glove. The glove arm pulls in toward the chest as the body turns, instead of flying open.
Release out front. The ball comes out in front of the head, with the fingers behind it, not to the side.
What does a good follow-through look like?
After release, the throwing arm keeps going, finishing across the body down near the opposite knee. The back leg swings through, so the player ends square to the target and ready to field. A short, stopped finish usually means the arm did all the work.
Throwing progression drills
These drills build the throw from the top down: first the upper body alone, then adding the feet, then distance. Treat the table as a starting point and stay at the shorter end for younger players.
| Drill | Distance | Reps | Ages |
|---|---|---|---|
| One-knee throws | 20 to 30 feet | 10 to 15 | All ages |
| Power position throws | 30 to 45 feet | 10 to 15 | All ages |
| Step-behind throws | 45 to 60 feet | 10 | 9 and up |
| Crow hop throws | 60 to 90 feet | 8 to 10 | 11 and up |
| Long toss, built up gradually | Past 90 feet | A few throws at the longest distance | 13 and up |
One-knee throws. Kneel on the throwing-side knee with the glove shoulder facing the partner. With the legs out of the picture, the player feels the arm path, the hip and shoulder turn, and the glove tuck.
Power position throws. Stand sideways, feet wide, arm already up in the power position, then rotate and throw.
Step-behind throws. Step the throwing-side foot behind the glove-side foot, then stride and throw. It teaches the feet to get the body sideways and moving toward the target.
Crow hop throws. Add the hop and distance, keeping throws on a line.
Long toss. For older players, gradually backing up over a session builds arm strength. Build distance over weeks, not in one day, and stop when throws lose their shape.
Common mistakes and fixes
Pushing the ball like a dart. The arm never gets back and up, so the ball is shoved from the ear. Fix it with slow arm circles into one-knee throws, letting the arm swing down and back.
Opening the front shoulder early. The chest turns before the foot lands, and the throw sails across the body. Keep the glove shoulder pointed at the target until the stride lands.
Elbow dropping below the shoulder. Throws come out flat or tail away. Power position throws help the player feel the right height.
Stepping off line. Draw a line in the dirt toward the target and have the front foot land on it.
Arm care for young throwers
Good mechanics help protect an arm, but so does how much a child throws. Orthopaedic surgeons list refining throwing technique, along with rest, as ways to prevent elbow throwing injuries in children (OrthoInfo, AAOS). They also advise always taking time to warm up (OrthoInfo, AAOS).
For any player who also pitches, MLB and USA Baseball's Pitch Smart guidelines set daily limits: 75 pitches at ages 9 to 10, 85 at ages 11 to 12, and 95 at ages 13 to 14, with four days of rest after 66 or more pitches (Pitch Smart, ages 9 to 12; ages 13 to 14). The same guidelines ask players at those ages to:
Take at least four months off from throwing every year, with at least two to three of those months in a row.
Avoid playing for multiple teams at the same time.
Play other sports during the year.
The American Sports Medicine Institute adds that a pitcher should not also be a catcher for their team, because the combination means many throws (ASMI).
Pain is a stop sign. Little Leaguer's elbow is an injury to the growth plate on the inside of the elbow, caused by repeated throwing, with pain at the bony bump there. OrthoInfo says a child should stop throwing if they have elbow pain or swelling, especially with a loss of throwing speed, or feel a pop, numbness, or tingling, and should get treatment if pain continues after a few days of rest or comes back when they throw again (OrthoInfo, AAOS).
When to work on throwing in New Jersey
High school baseball in New Jersey is a spring sport. The NJSIAA spring quick chart lists March 8, 2027 as the first day of baseball practice for 2026-27, with games allowed from March 15 (NJSIAA; all dates are listed as tentative). Town Little Leagues also play in the spring, so fall and winter are the natural time to rebuild mechanics.
That window has to share space with the yearly break from throwing. A simple plan: pick the months off first, then fit mechanics work around them. Short, low-effort sessions indoors, like one-knee throws into a net, can clean up the arm path without adding much throwing volume.
If your child works with a private coach, ask one question: can you film the throw from the side and from behind, and show me the one thing to fix first? A good coach will pick one fix, give a drill for it, and leave the rest for later. For how lessons fit around team practice, see private baseball lessons vs team practice.
When you are ready, compare private baseball coaches in New Jersey on Rite Coach by experience and the ages they train, then contact them directly. For the other half of the game, see our baseball hitting drills for kids.
Frequently asked questions
How can my child throw harder?
Mostly through better mechanics and normal growth: a full arm path, the hips turning before the shoulders, and a complete follow-through. Throwing more is not the shortcut, and ASMI advises against using radar guns with young pitchers.
Why do my child's throws go everywhere?
Usually because of the feet or the front shoulder. Stepping off line or opening up early sends throws wide. Start with one-knee throws, then add a stride along a line in the dirt.
Should young players do long toss?
Younger players do better at moderate distances with good form. Long toss suits teenagers who build up gradually, stop when throws lose their shape, and still take their yearly months off.
Looking for a private baseball coach?
Rite Coach lists coaches across New Jersey.